


A classic red velvet cake is among the world’s exceptional desserts. The nostalgia and elegance evoked by red velvet cake stems from its distinct crimson color, the rich velvety texture, and a unique blend of subtle cocoa flavor. Achieving perfection with a red velvet cake, however, is more of a challenge than simply following a recipe. For many home bakers trying to perfect red velvet cake, the difficulties lie in ensuring a moist crumb, a consistent texture, and a deep red color, all while maintaining flavor and structure.
If you are preparing to bake a red velvet cake, make sure to follow the professional tips and techniques mentioned below to identify all the recipe’s essential steps, even before the mixing begins.
Why Moisture Matters in a Classic Red Velvet Cake
The moist, tender, and finely textured characteristics of a red velvet cake make it a sweet treat. Unfortunately, dryness is one of the most common issues encountered with this cake. While dry results can stem from several causes, such as poor mixing techniques, unbalanced ingredient ratios, and overbaking, most of these issues can be addressed with a few proactive actions.
Key factors that influence moisture are:
- Use of the correct fats (oil vs. butter)
- Proper incorporation of acidic buttermilk or vinegar
- Avoiding overmixing
- Use of high-quality ingredients
Choosing the Right Fat: Oil vs. Butter
Butter provides a savory, traditional flavor, while oil provides a much better moisture share. Many bakers opt for a combination of both to get a balanced result, savoring the butter and softness from oil. For a lighter, tenderer crumb, adding vegetable or canola oil to the batter improves the cake’s texture without dominating its flavor. You can blend half unsalted butter (creamed with sugar for aeration) and half oil for moisture. This dual-fat strategy provides structure and softness.
The Importance of Buttermilk and Vinegar
Buttermilk and white vinegar are integral to traditional Red velvet cake, enhancing flavor and texture. Their role goes beyond nourishment.
- Buttermilk adds moisture and enhances the cake’s tangy flavor.
- The mixture of baking soda and vinegar is biochemically active and not only enhances the cake’s softness but also provides leavening.
Both of the ingredients’ acidity helps catalyze the activation of the red color. Also, it allows the color to remain vivid after baking. Always prefer full-fat buttermilk; it enhances richness and texture.
Getting the Perfect Color in a Classic Red Velvet Cake
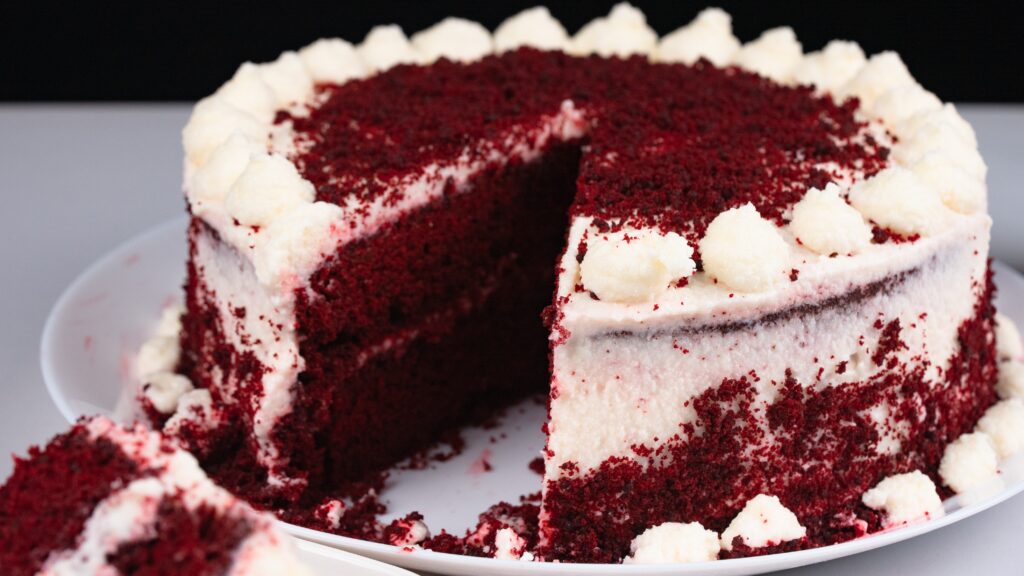
The characteristic red color of classic red velvet cake defines and distinguishes it from the rest. While the color doesn’t add to the flavor, it certainly enhances and improves the dining experience.
The liquid-to-batter ratio is not affected by powdered coloring, which is rich in pigment. It is very effective, especially when sifted and combined with cocoa powder, as it ensures uniform distribution of the ingredients and prevents clumping. However, it may produce a slightly dull and dusty hue.
Modern baking prefers gel food coloring for its vibrant color and ease of application. A small dosage of a teaspoon or less can produce a deep, rich red without changing the batter’s consistency. Professional kitchens widely utilize brands like AmeriColor or Wilton.
Cocoa Powder: A Small but Essential Addition
A classic red velvet cake is a delightfully popular cake, but it is not a classic chocolate cake. Even so, it has a slight hint of chocolate blended in. The subtle hint of chocolate enriches the overall flavor. It works with the cake’s acidic components to prevent it from turning brown.
Remember to use unsweetened cocoa that has not been Dutch-processed. The Dutch process will make the cocoa too alkaline, not support the cake’s rise, and, not to mention, eliminate the vibrant red color.
Recommended Bakeware & Tools for the Best Red Velvet Cake
Achieving efficiency and completing tasks quickly is very much possible with the right, high-quality tools. These products are available via Amazon and are trusted by experienced home bakers and professionals:
- USA Pan 9-Inch Round Cake Pan: Heavy-gauge cake pans are the best. USA 9-inch pans are made from thick-gauge aluminum. The silicone non-stick coating allows even heating of the cake and facilitates easy removal.
- Wilton Cake Leveler: A very easy way to get smooth, level cake layers.
- KitchenAid Artisan Tilt-Head Stand Mixer: Workhorse is the right phrase, as it blitzes through stubborn batter with ease. This mixer makes creamy frostings and smooth and airy batters.
- Ateco Offset Icing Spatula: Ideal for achieving even and smooth frosting applications.
- Snapware Cake Carrier With Locking Lid: Keeps your cake protected and fresh during transportation and storage.
These tools can help minimize mistakes due to uneven baking, under-mixing, or inaccurate handling.
Additional Baking Tips for Best Results
- Room temperature for all ingredients, such as eggs, buttermilk, or vinegar, for easy blending and a uniform batter.
- Sift all dry ingredients to prevent lumps and improve aeration.
- Chill cake layers before frosting to simplify the stacking and frosting process. Refrigerating the wrapped cooled cakes for at least an hour helps these steps become much tidier.
Grocery List
To aid your preparation, here is a grocery list of ingredients you can easily find on Amazon’s storefront. For people ordering via Amazon Fresh or online shopping, these offer a high level of quality and ease of shopping.
Shop online using our list below.
- Gold Medal All-Purpose Flour
- Granulated Sugar
- Arm & Hammer Baking Soda
- Iodized Salt
- Unsweetened Cocoa Powder
- Crisco Pure Canola Oil
- SACO Cultured Buttermilk Blend
- AmeriColor Super Red Soft Gel Paste
- Heinz Distilled White Vinegar
- Pure Vanilla Extract
- Domino Confectioners Sugar
- Philadelphia Cream Cheese
- Kerrygold Unsalted Butter
- Large Eggs – Organic or Pasture-Raised
Having these tools and techniques will set you up to create a stunning and delectable red velvet cake. Each ingredient plays a pivotal role in baking a perfect cake. Cookware, tools, and high-quality materials contribute to creating a cake worthy of any celebration.
Now that you’re equipped with the knowledge, let’s move on to the recipe.
This post contains affiliate links, which means we may receive a commission at no cost to you. As an Amazon Associate, I earn from qualifying purchases.
How to Make the Best Classic Red Velvet Cake
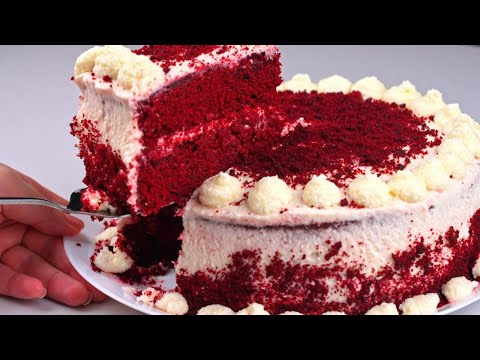
This two-layer red velvet cake is soft, moist, and full of flavor, thanks to a balanced blend of cocoa powder, buttermilk, and vanilla. The cake rises beautifully with the help of baking soda and vinegar, creating a light and fluffy texture. Its deep red color makes it as visually impressive as it is tasty.
Each step is beginner-friendly, from creaming the butter and sugar to folding in the vibrant red batter. Once baked and cooled, the layers are stacked and frosted with a rich, silky cream cheese frosting that perfectly complements the subtle cocoa notes in the cake. You can also add a sprinkle of red velvet crumb on top for an elegant finish.
Whether you're making it for a celebration or just because, this red velvet cake is a bakery-quality dessert you can make at home, it’s reliable, crowd-pleasing, and guaranteed to earn you compliments with every bite.
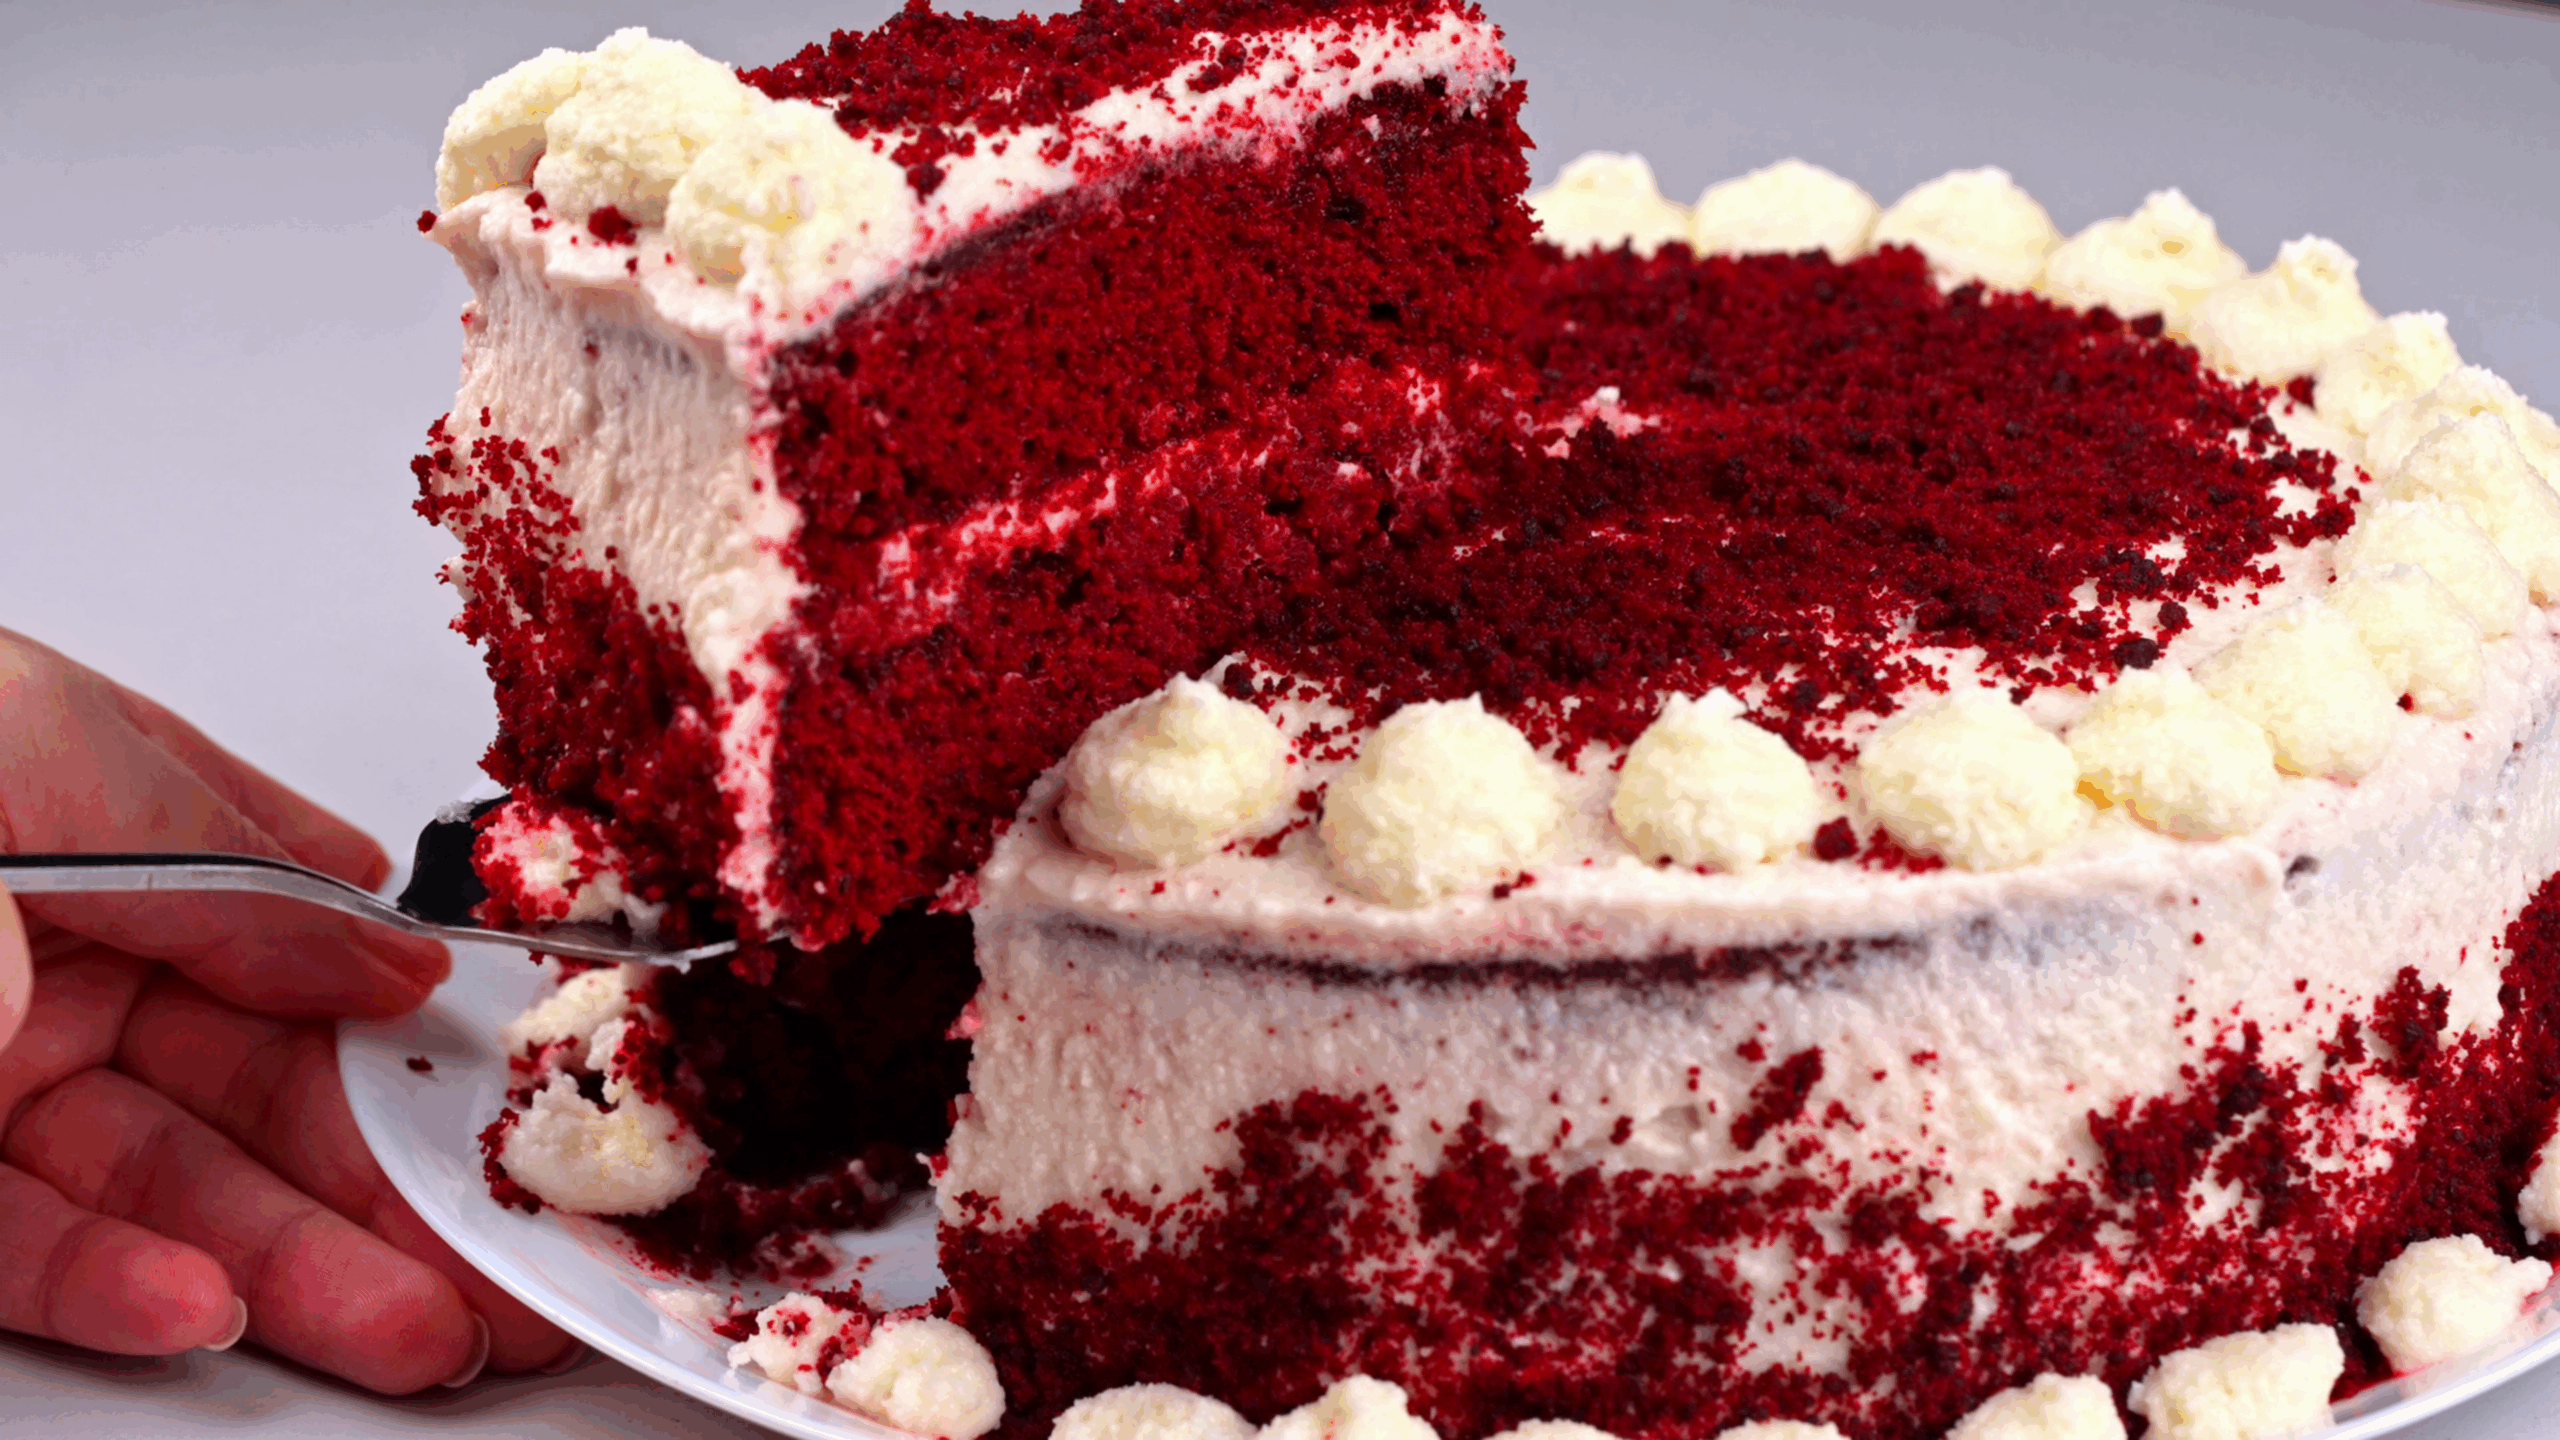
The ingredients in this Red Velvet Cake recipe are enough to make two 8-inch cake layers.
🧁 Red Velvet Cake Batter Ingredients
Dry Ingredients:
Wet Ingredients:
Leavening (Helps the cake rise and stay fluffy)
🧁 Cream Cheese Frosting
Ingredients
How to Make a Classic Red Velvet Cake Step-by-Step:
-
Prep Your Equipment & Oven:
Preheat your oven to 340°F (170°C). Grease and line two 8-inch round cake pans with parchment paper.
-
Sift the Dry Ingredients:
In a medium bowl, sift together the flour, cocoa powder, salt, and red food coloring powder (if using powder). Set aside.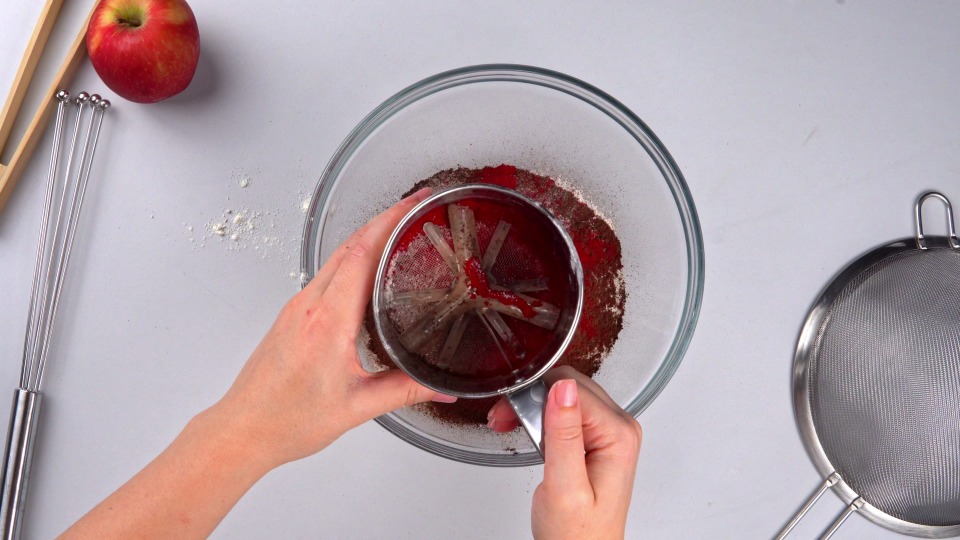
-
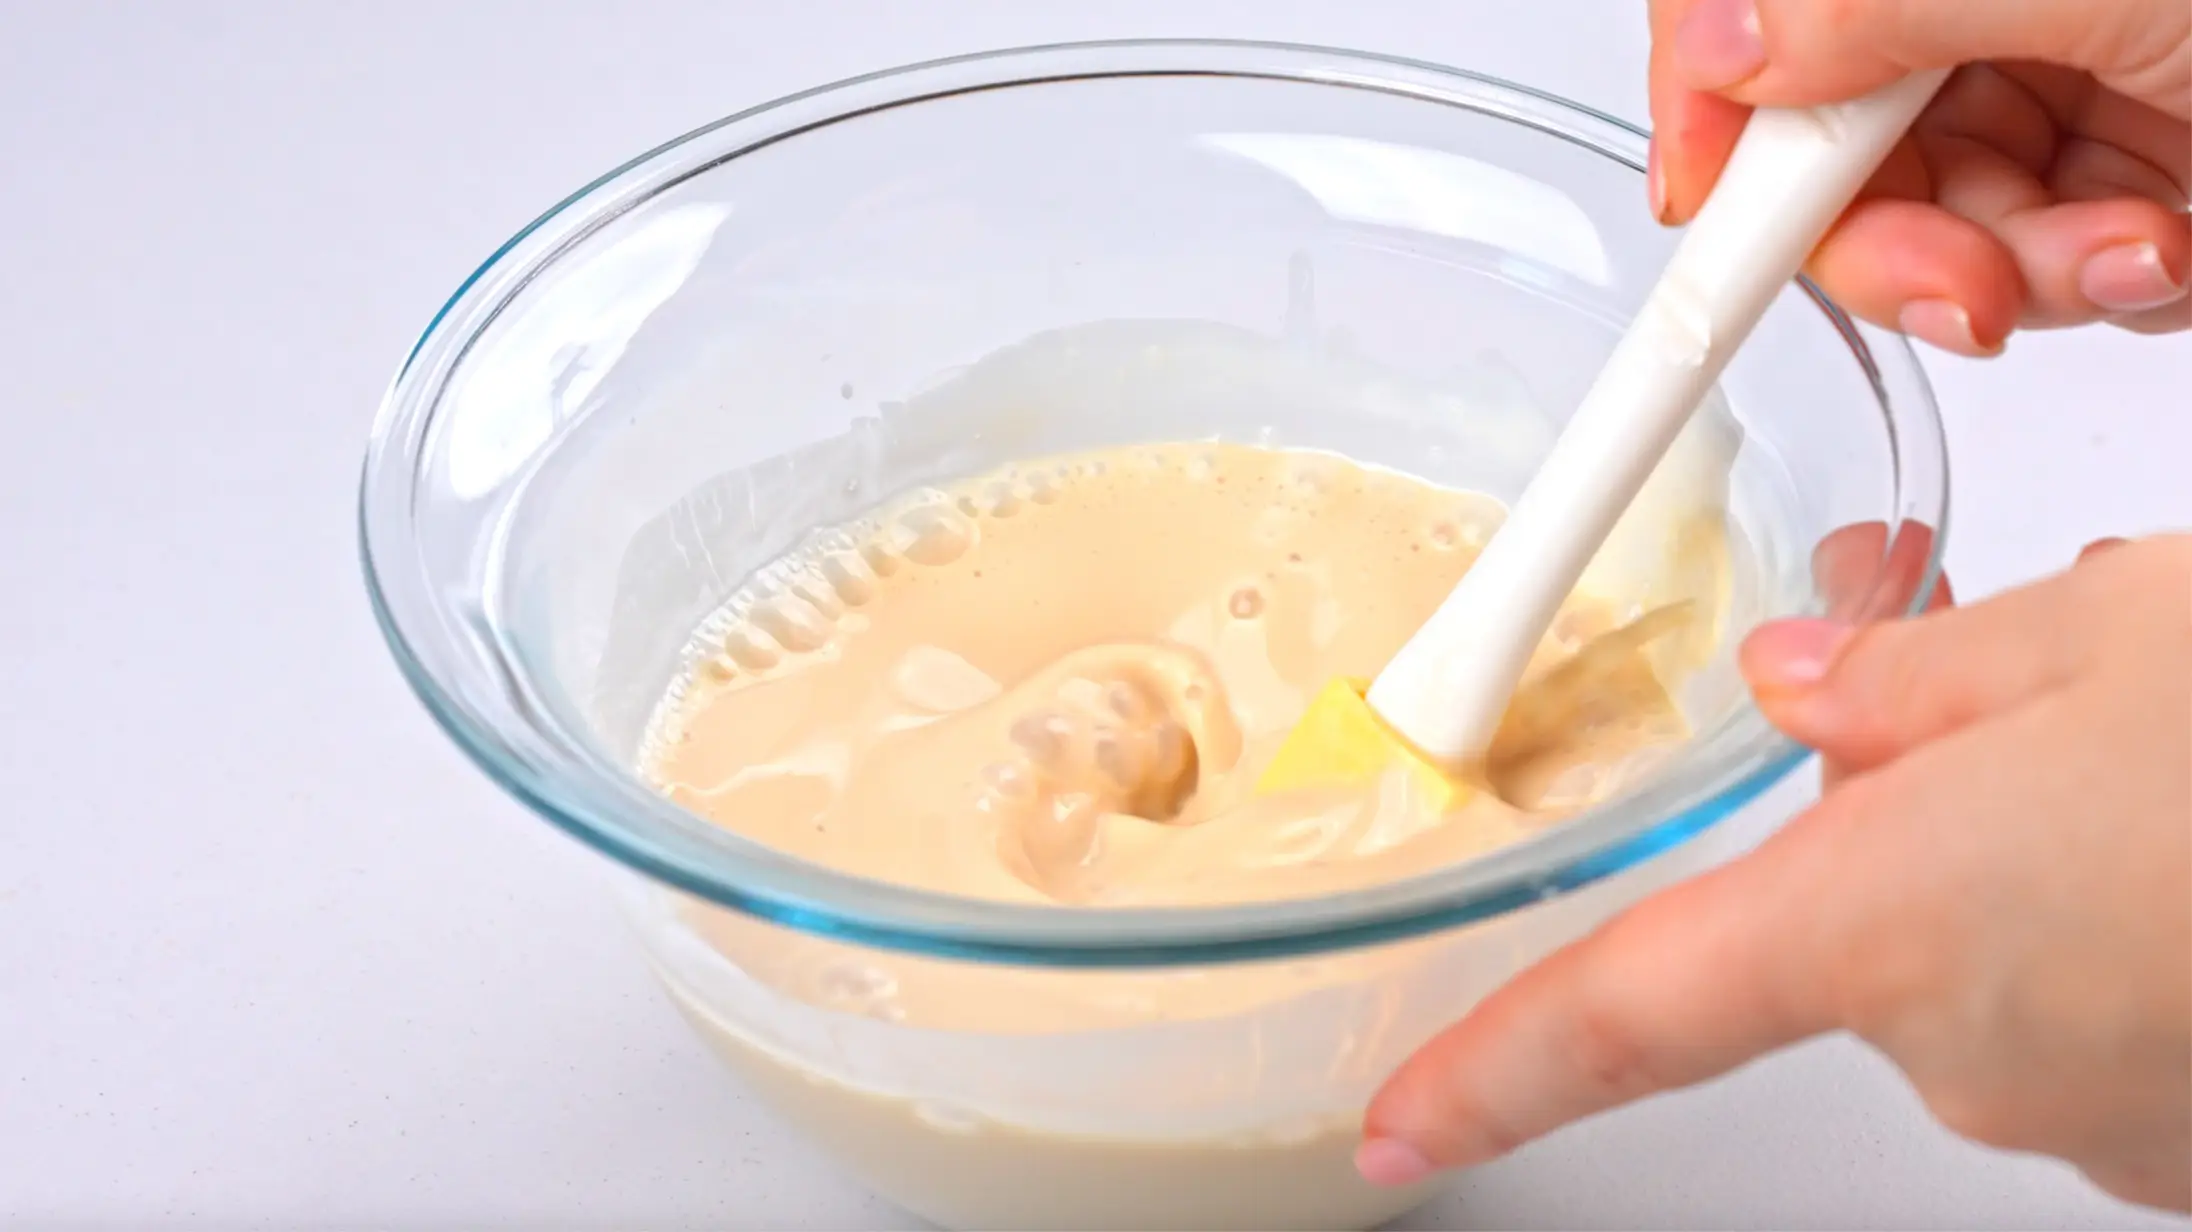
Mix the Buttermilk & Vanilla:
In a separate bowl or measuring cup, whisk together the buttermilk and vanilla extract (and red gel coloring if using gel). Set aside.
-
Cream the Butter & Sugar:
In the bowl of a stand mixer fitted with the paddle attachment, beat the softened butter and granulated sugar on medium speed for about 5 minutes, or until the mixture is light and fluffy.
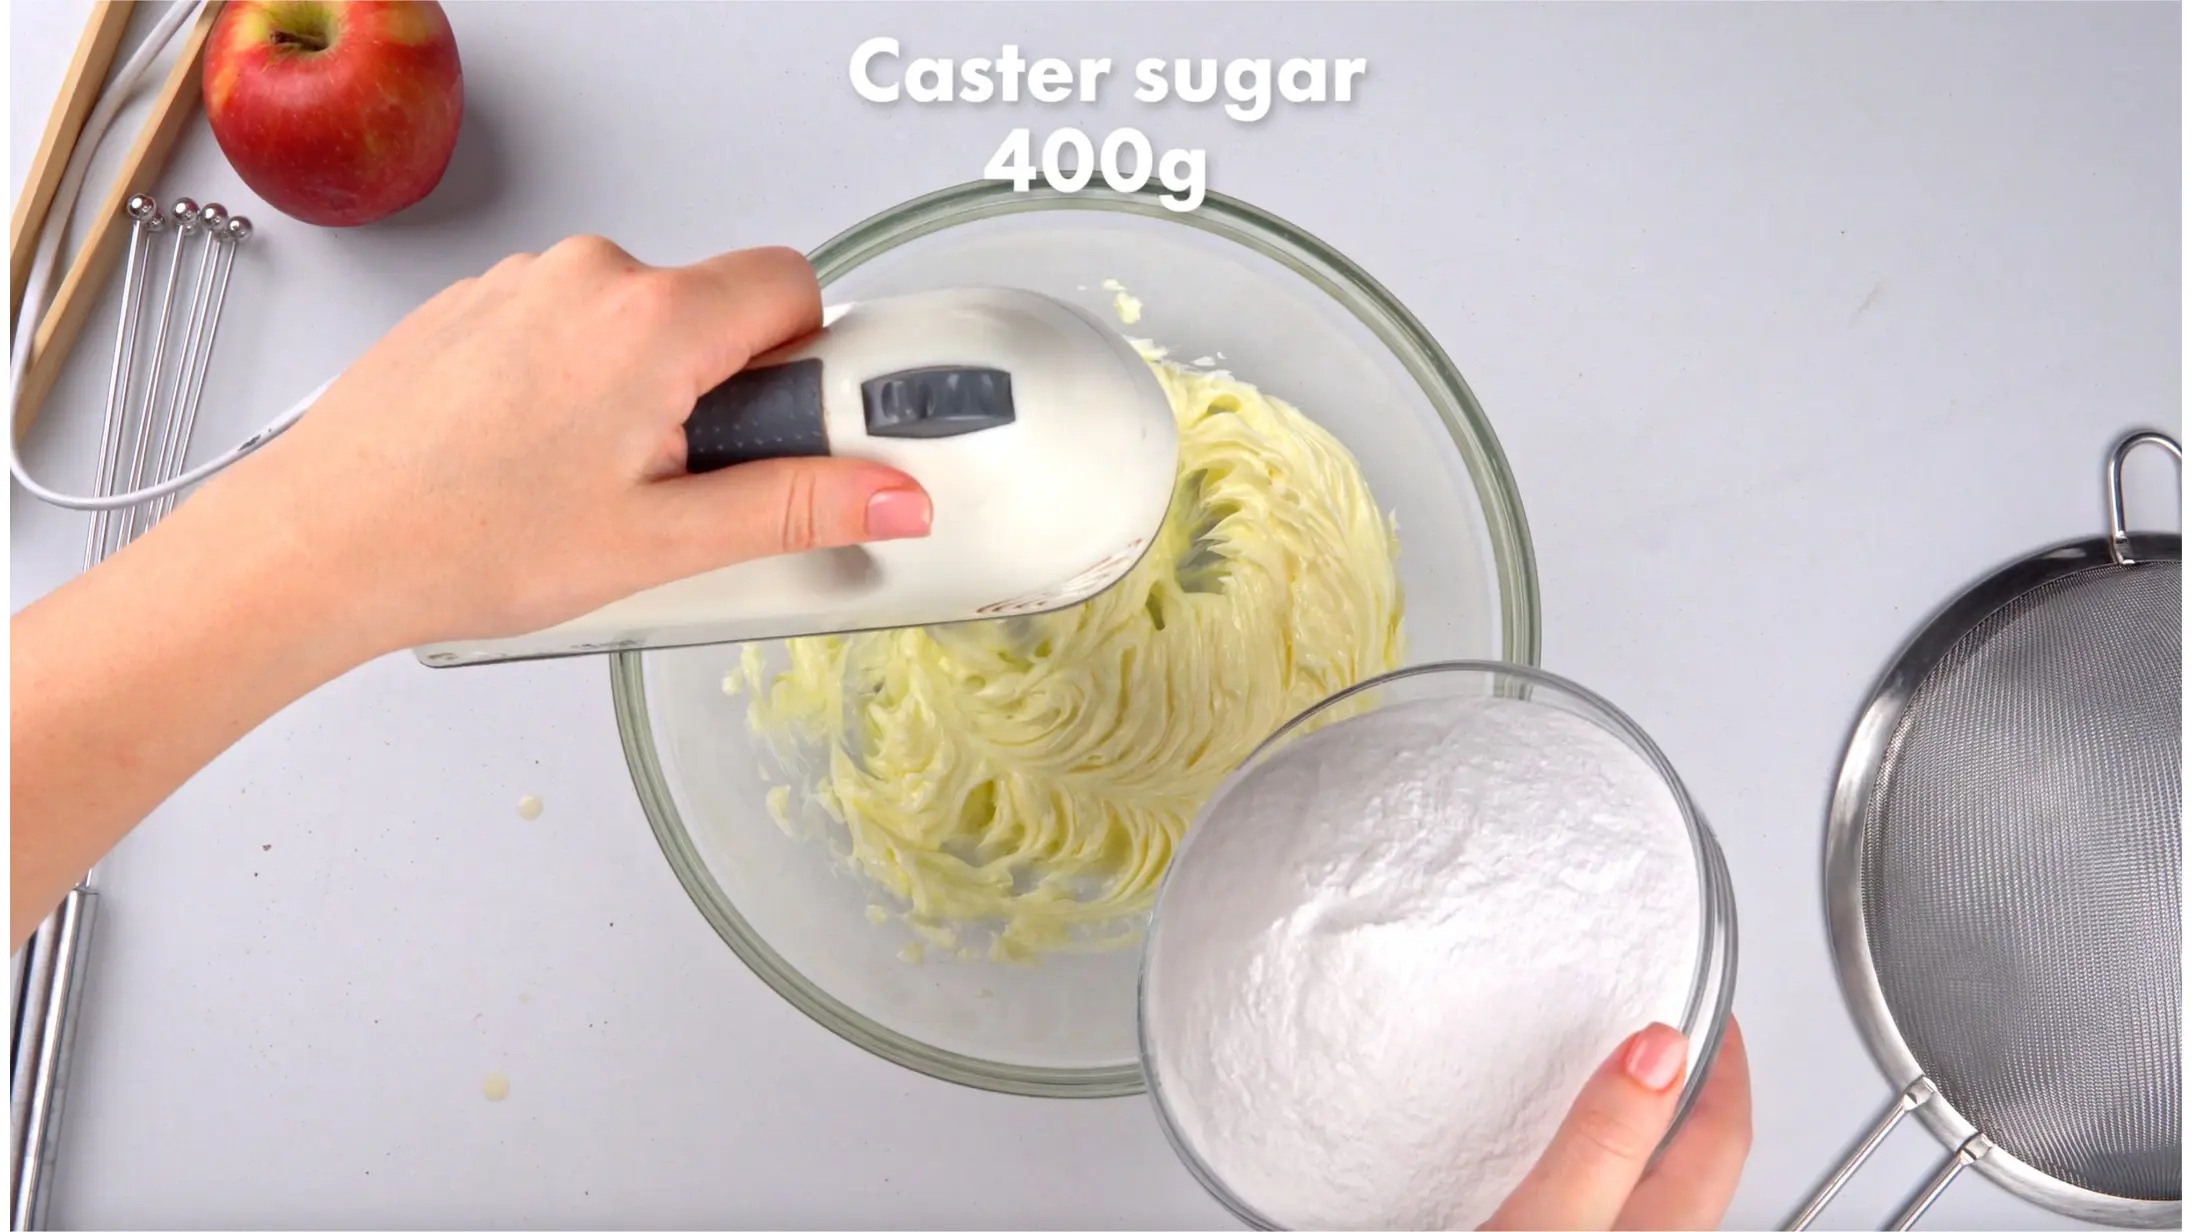 Scrape down the sides and bottom of the bowl halfway through.
-
Add the Eggs:
With the mixer on low speed, gradually add the beaten eggs in three additions.
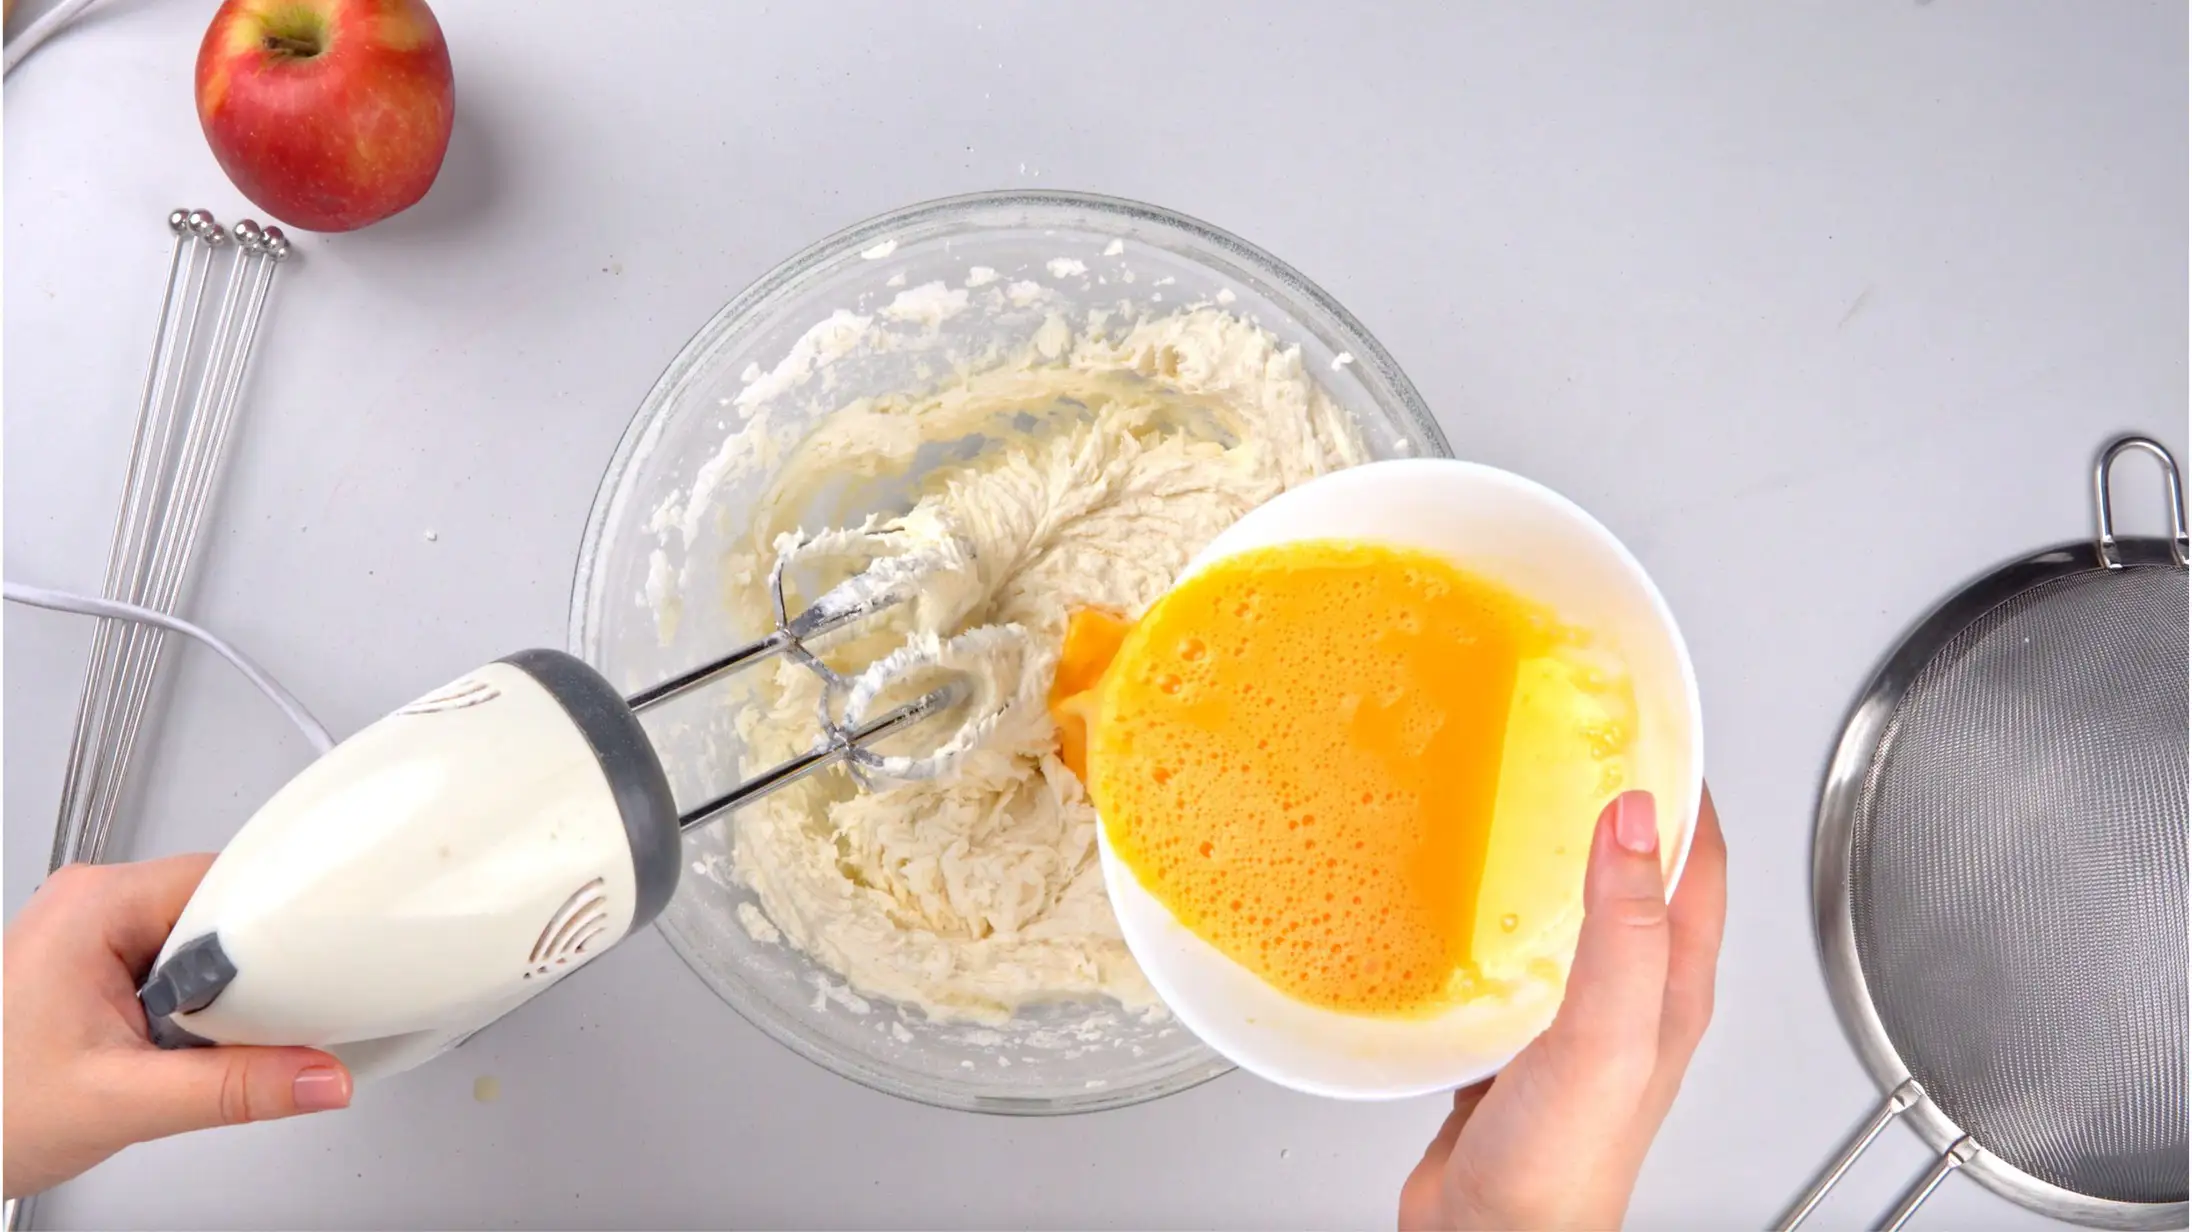 Scrape down the bowl and paddle after each addition to ensure everything is well mixed.
-
Alternate the Dry & Wet Ingredients:
Reduce the mixer to low speed.
- Add ⅓ of the dry mixture and mix just until combined.
(The dry mixture is the sifted blend of flour, cocoa powder, salt, and red food coloring powder from Step 2.) - Add ⅓ of the buttermilk mixture and mix just until combined.
(The buttermilk mixture is the combination of buttermilk, vanilla extract, and red gel food coloring if using gel, from Step 3.) - Repeat this process two more times, alternating between dry and wet, and mix only until just incorporated each time.
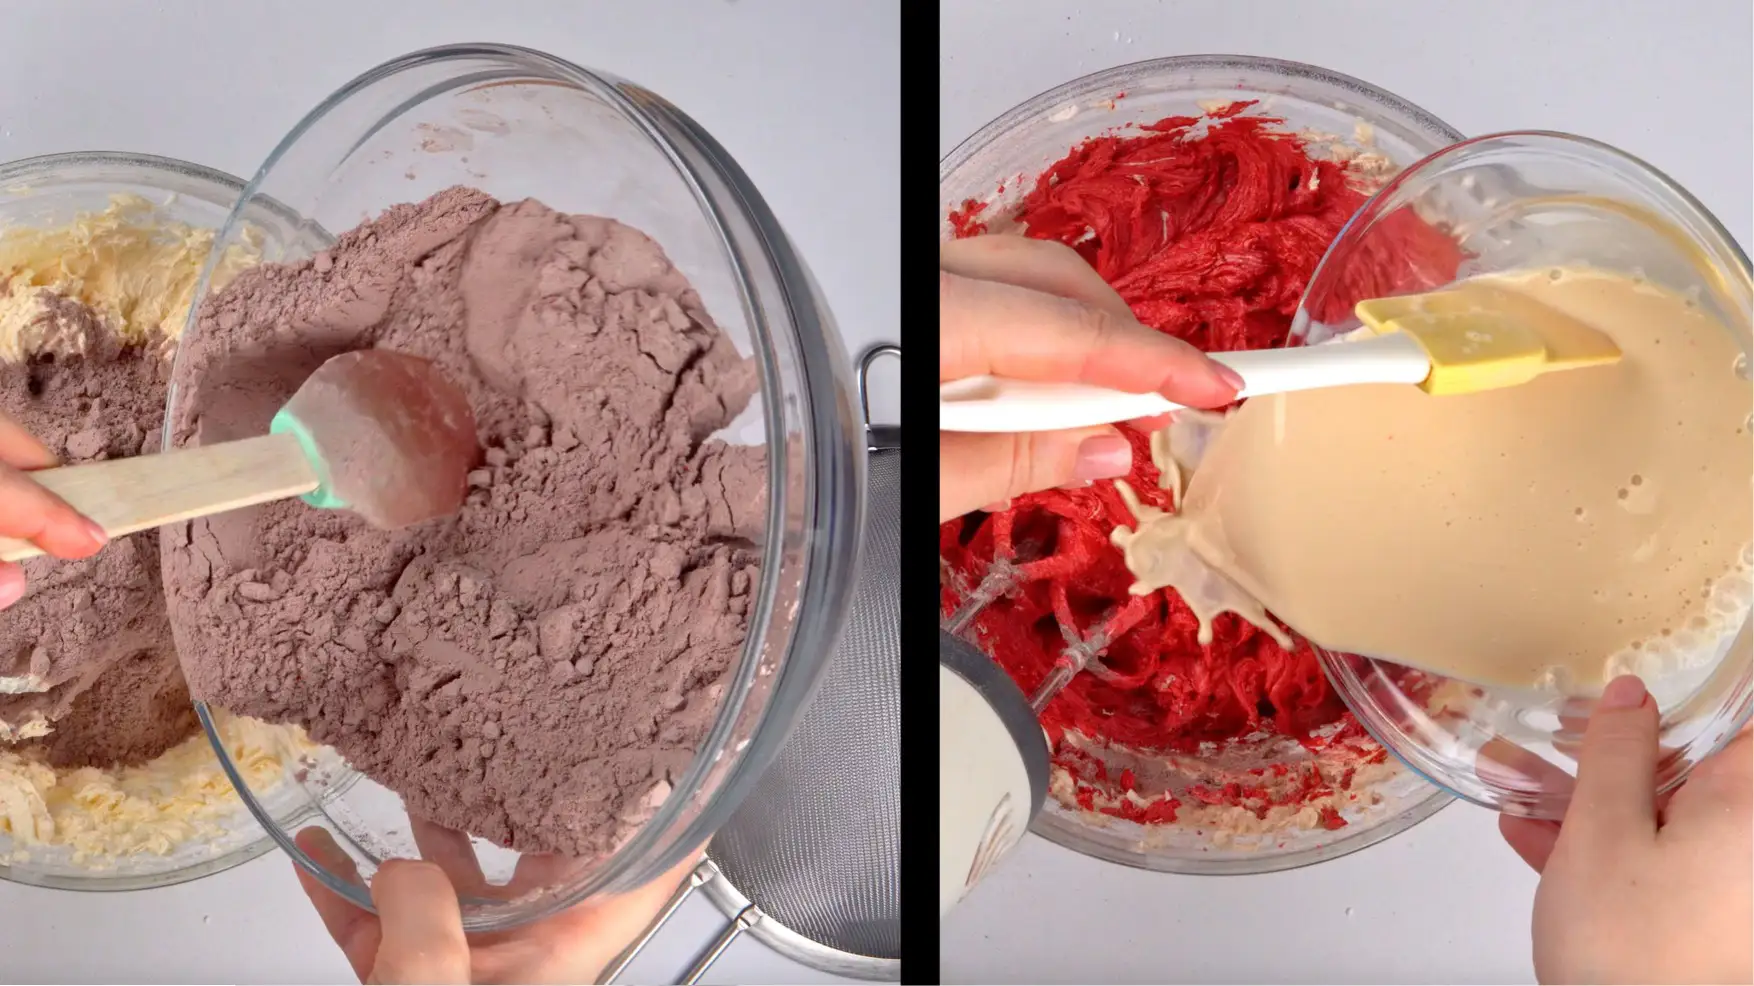 Do not overmix once flour is added.
 - Add ⅓ of the dry mixture and mix just until combined.
-
Add Leavening (Vinegar + Baking Soda):
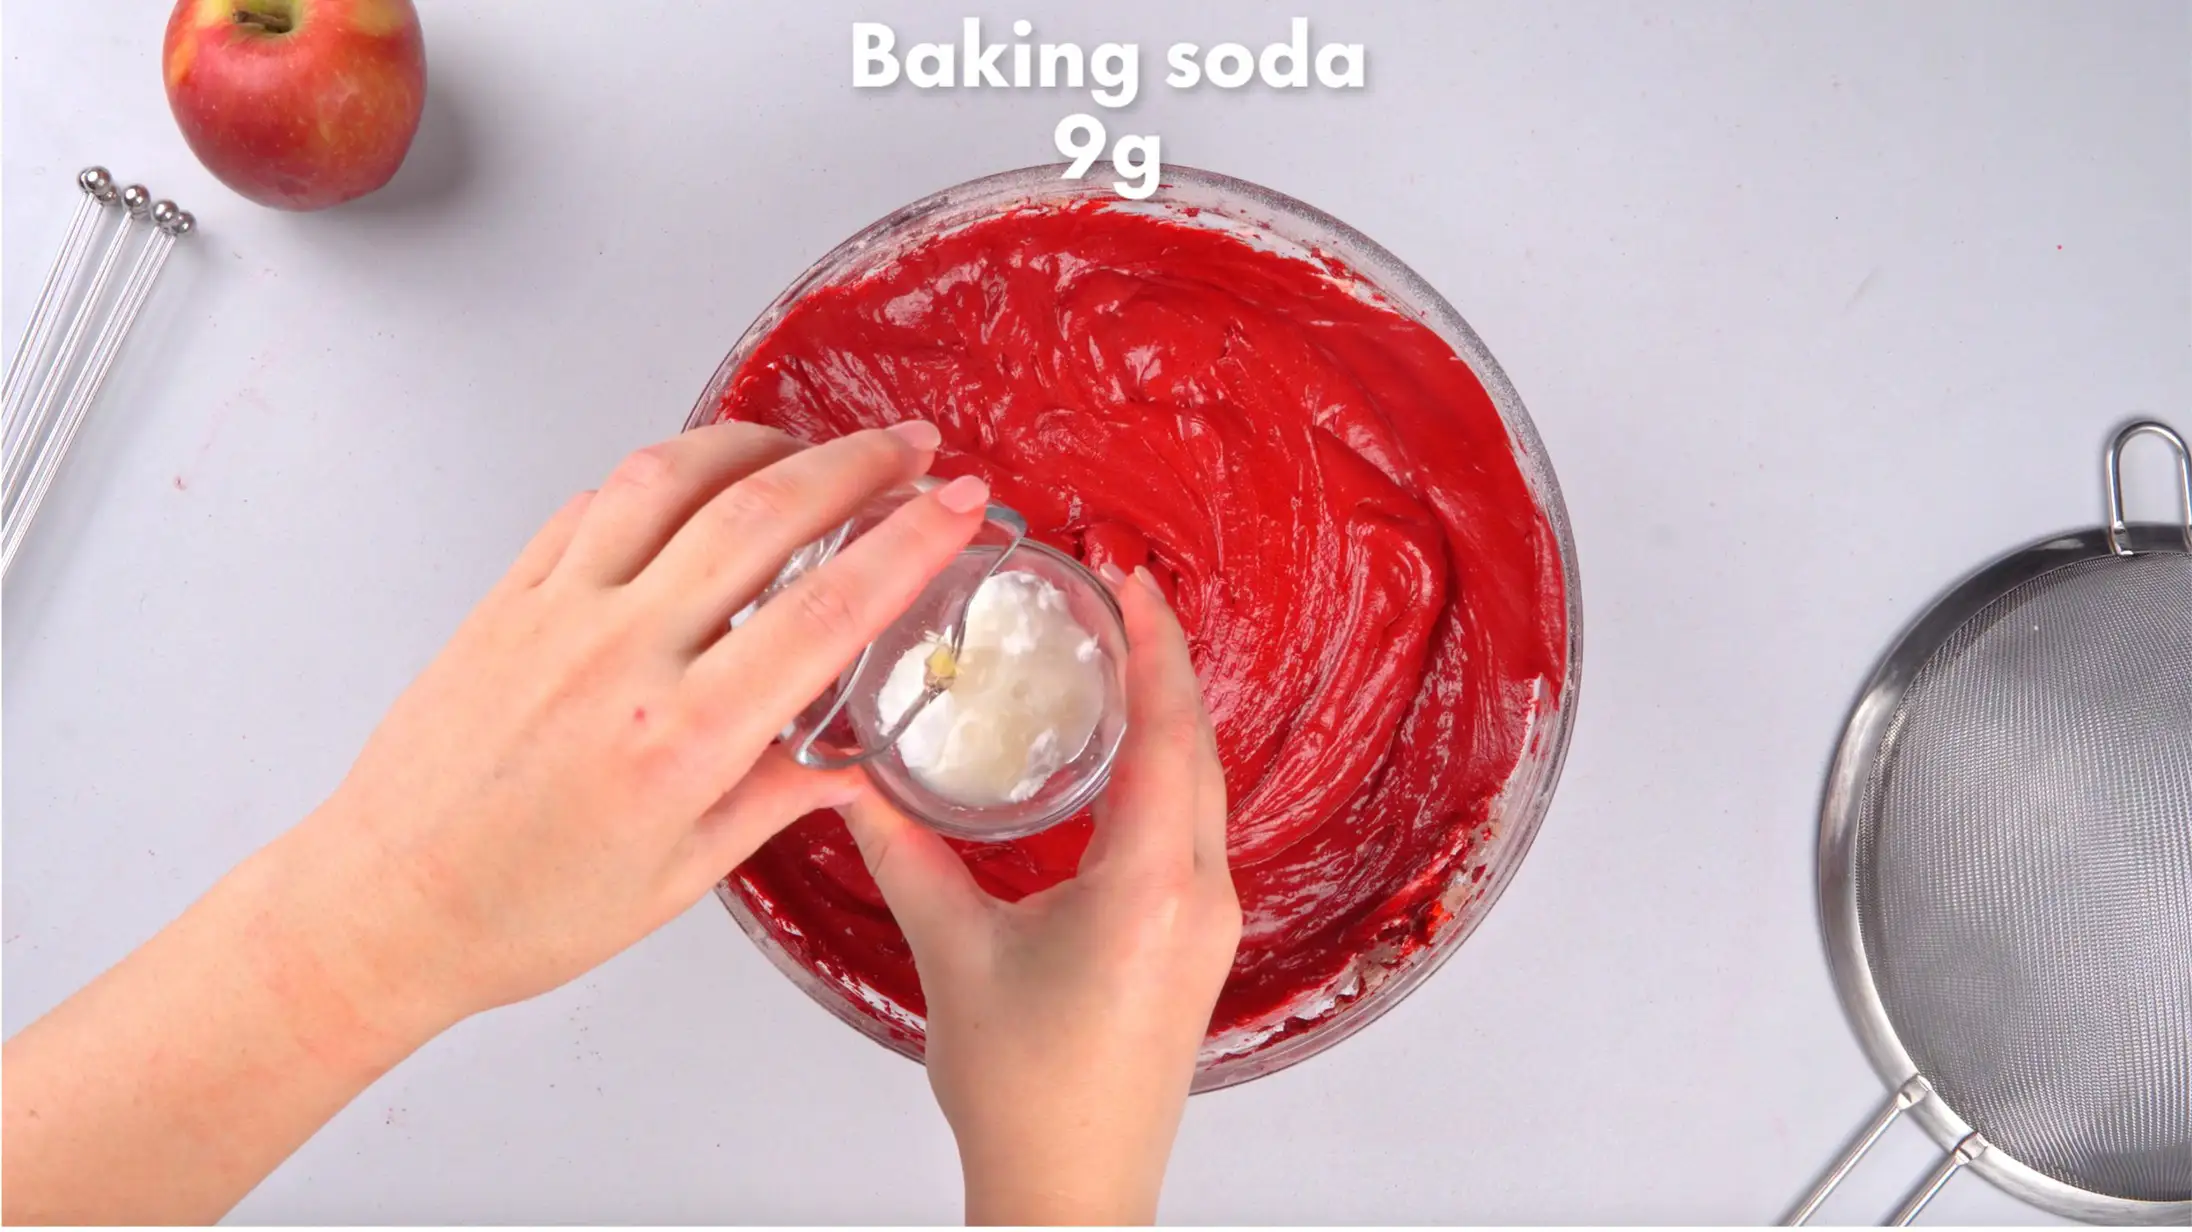
In a small bowl, stir together the baking soda and white wine vinegar (it will foam).
-
Add this fizzy mixture to the cake batter.
-
Pulse the stand mixer a few times or gently fold it in by hand with a spatula, just until evenly distributed.
-
-
Divide & Bake:
Divide the batter evenly between the two prepared cake pans.
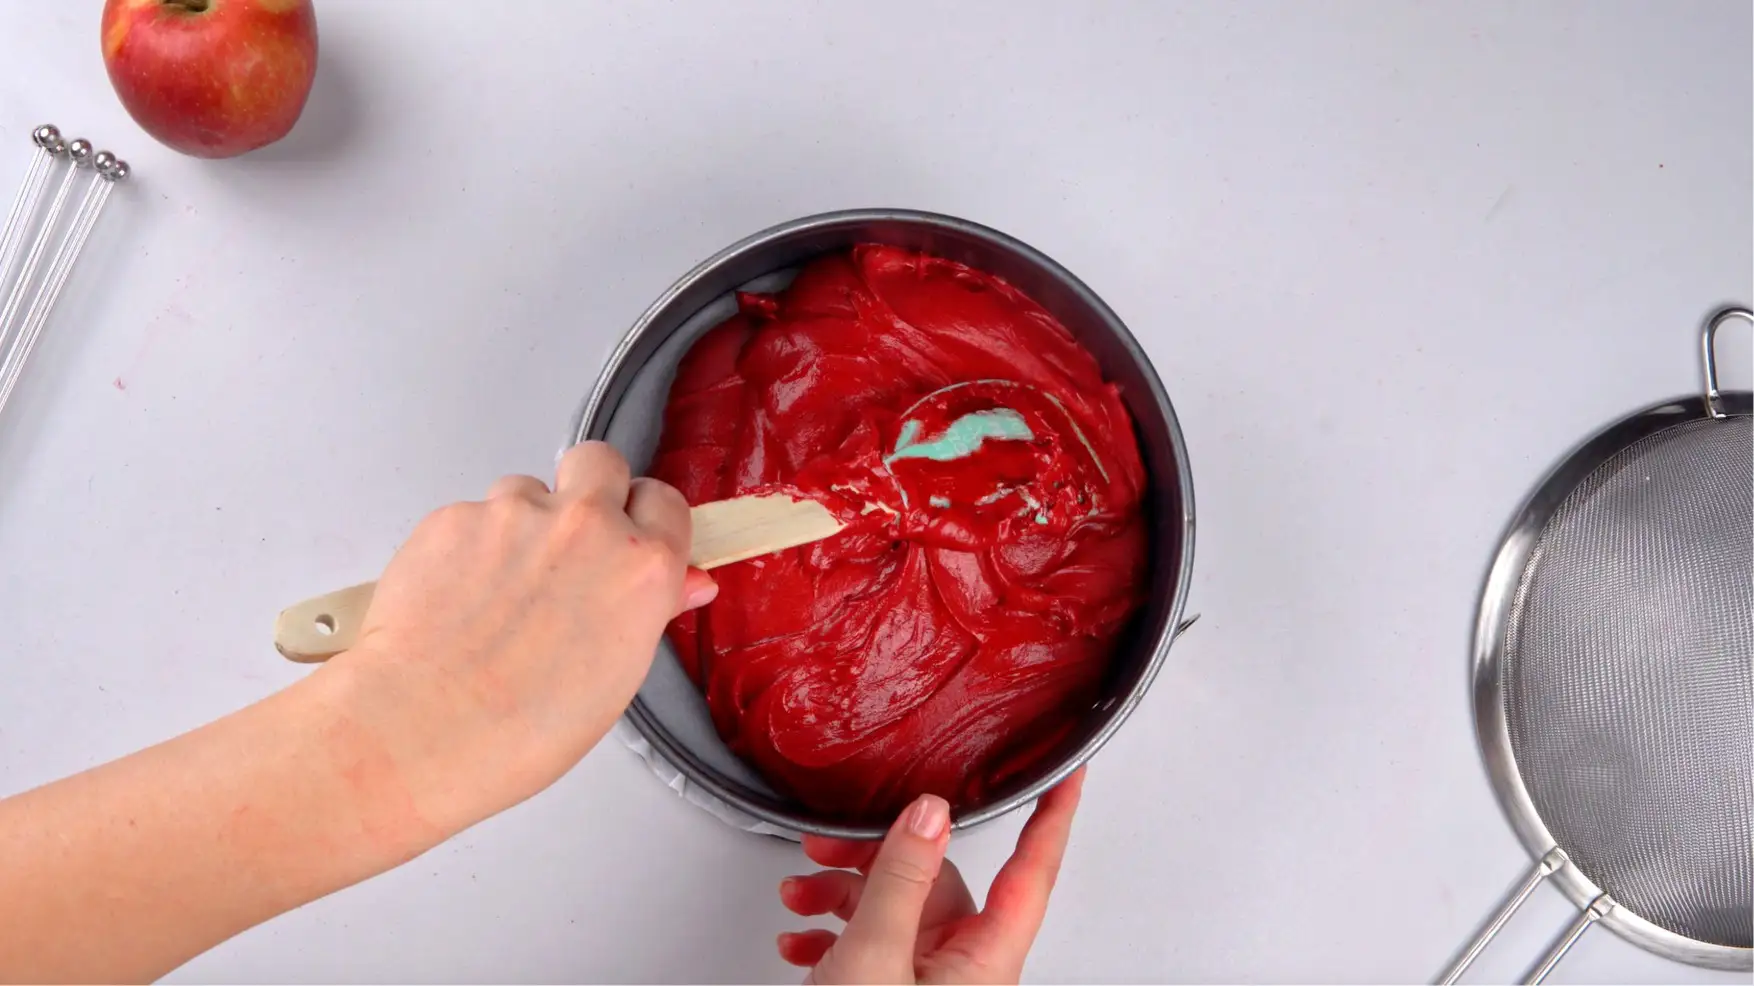 Tip: Use a kitchen scale for precision. Bake for 30–35 minutes, or until a toothpick inserted in the center comes out clean and the top springs back when lightly pressed.
-
Cool:
Let the cakes cool in the pans for 20–30 minutes, then carefully remove and transfer to a wire rack to cool completely before frosting.
🧁 Cream Cheese Frosting: Step-by-Step Instructions
-
Start with Soft Ingredients:
Make sure both your butter and cream cheese are at room temperature—soft but not melted. This helps them blend smoothly.
-
Cream Butter & Cream Cheese:
In a stand mixer fitted with the paddle attachment, beat the butter and cream cheese together on low speed for about 1 minute, just until combined.
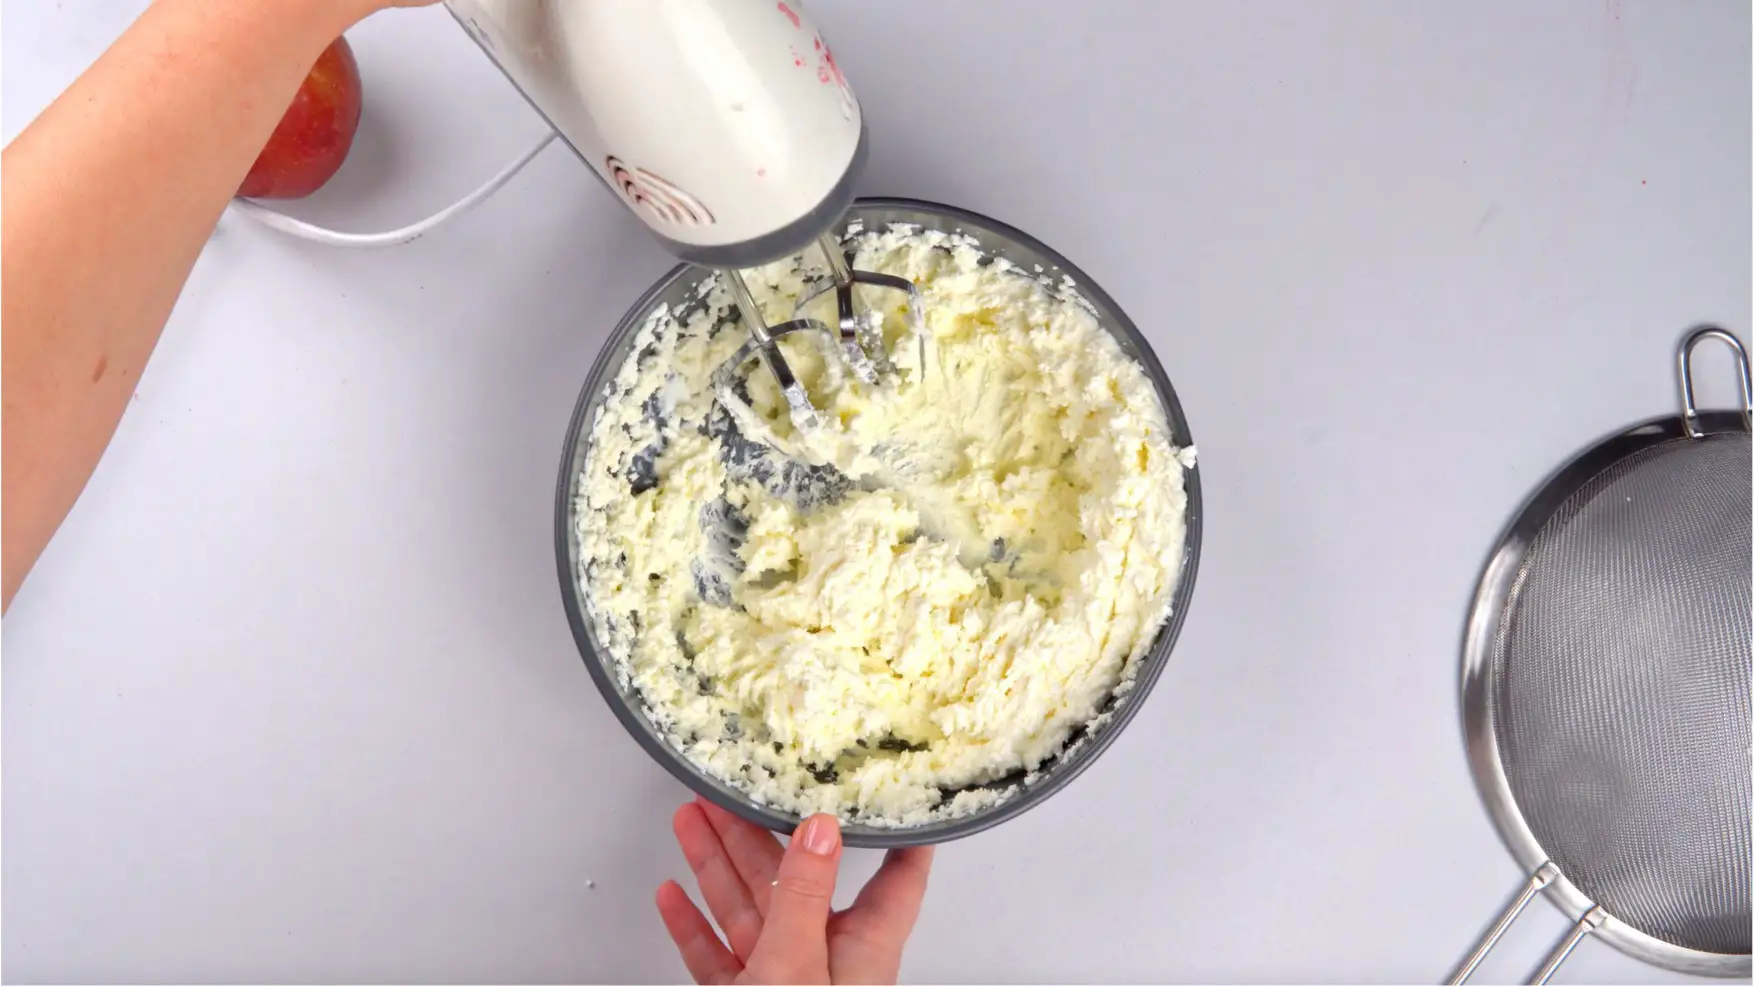 Scrape down the sides of the bowl. Then, increase to medium speed and mix for another 2–3 minutes, until light, fluffy, and slightly pale.
-
Add Powdered Sugar in Stages:
Reduce the mixer to low speed.
-
Add the sifted powdered sugar in 3 separate additions, mixing on low after each one until fully incorporated.
-
Add a pinch of salt to balance the sweetness.
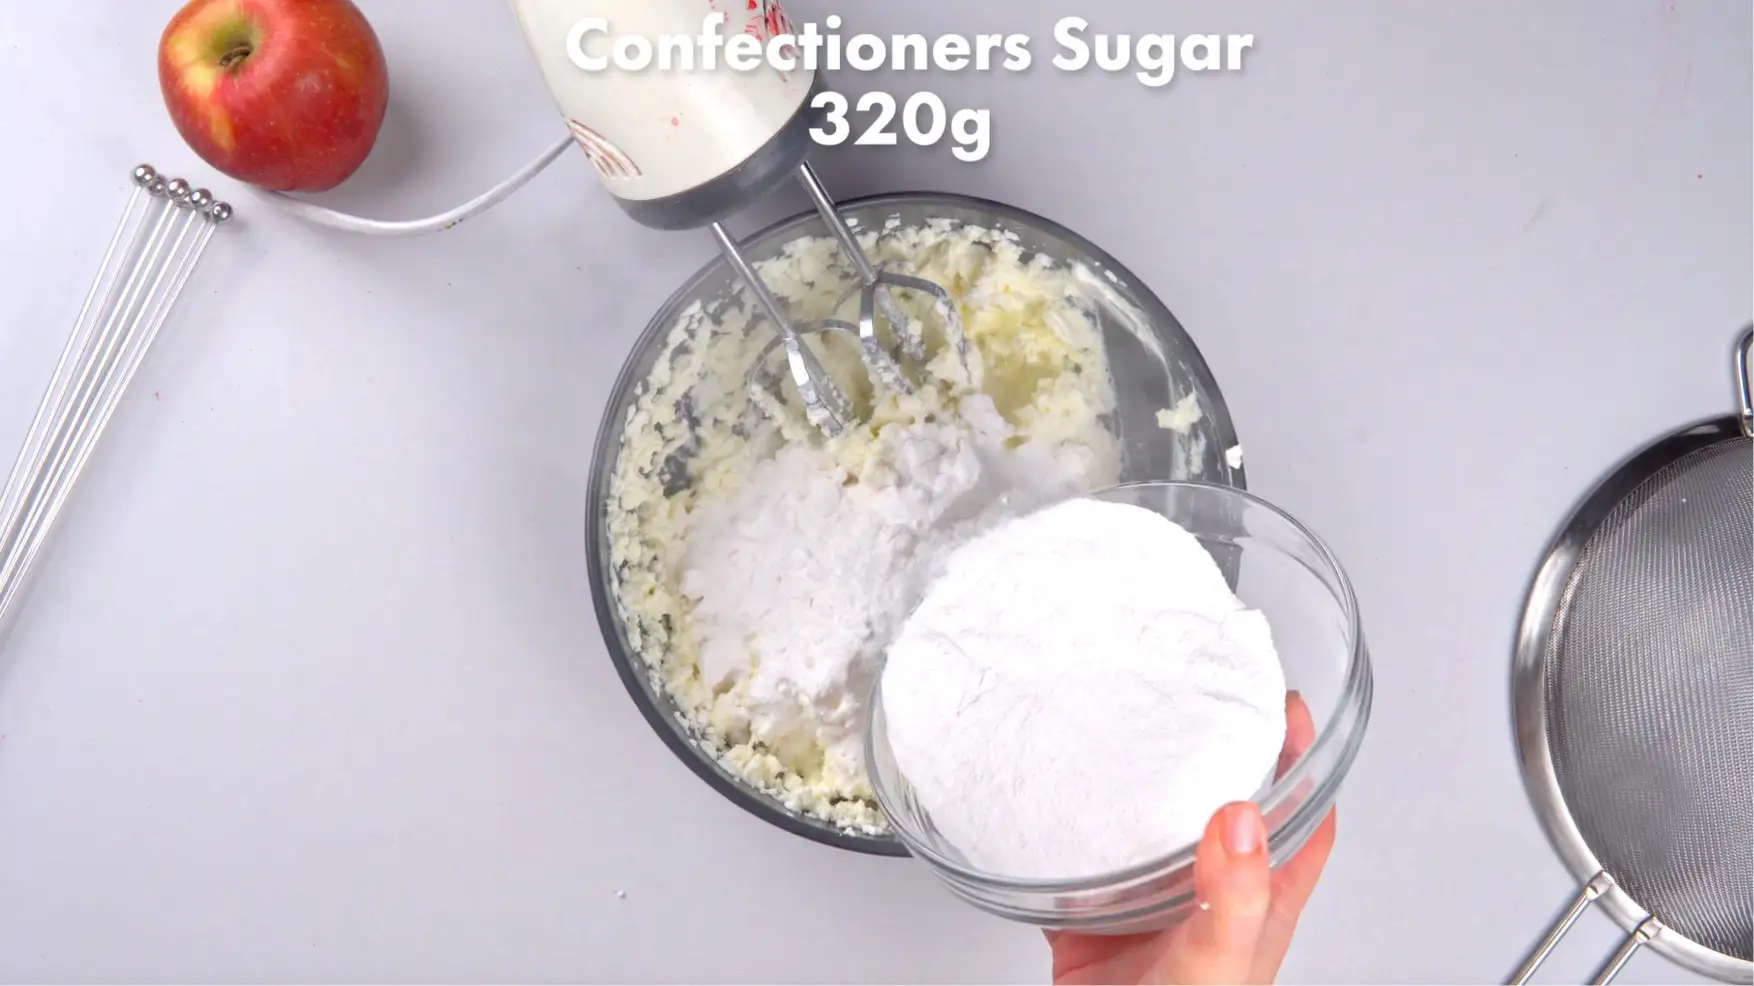 Scrape the bowl between additions to prevent lumps.
 -
-
Whip Until Smooth:
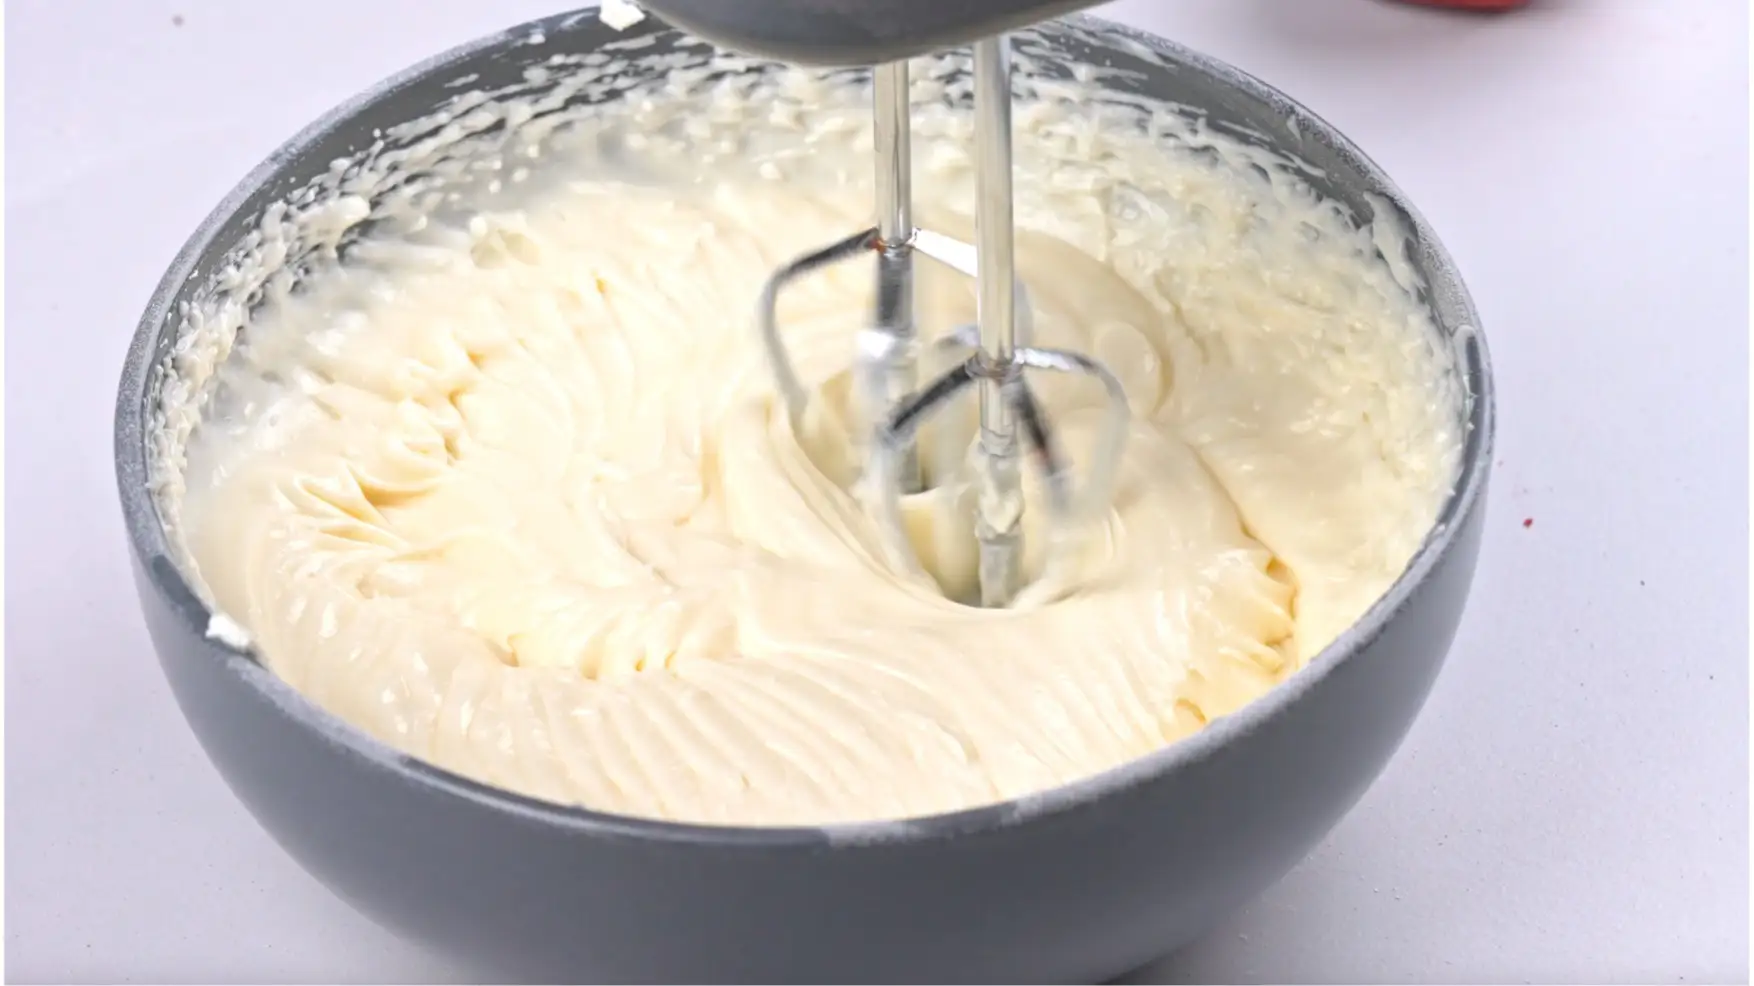
Switch to the whisk attachment and beat on medium speed for another 2–3 minutes, until the frosting is silky, fluffy, and smooth.
-
Frost or Chill:
Use the frosting immediately to fill and cover your red velvet cake.
If the frosting feels too soft to work with, refrigerate it for 20–30 minutes to firm it up before spreading or piping.
Note
📝 Baking Notes for Best Results
- Use Room Temperature Ingredients: Make sure butter, eggs, and cream cheese are at room temperature before starting. This ensures smoother mixing and better texture.
- Don’t Overmix: Once you add flour, mix only until combined to avoid a dense cake.
- Food Coloring Tip: Adjust red food coloring to your preference and brand strength. Gel coloring offers more intensity with less liquid.
- Level Cake Layers: Use a kitchen scale to evenly divide the batter for even layers.
- Chill Frosting if Needed: If your cream cheese frosting is too soft, refrigerate for 20–30 minutes before spreading or piping.